This guide will give you the basic directions for nail care; however, it cannot provide the same direction and hands-on experience offered by a professional school of cosmetology.
SUPPLIES:
1 – Nail scissors
2 – Small tray, about the size of a soap dish
3 – Gentle dishwashing detergent or other skin softening, bubbly liquid (such as some bubble bath products)
4 – Warm water
5 – Two to three hand towels
6 – Moisturizer or hand lotion with Aloe Vera, cocoa butter or similar ingredient to condition skin
7 – Clear base coat nail polish
8 – Colored nail polish
9 – Top coat nail polish
10 – Small lamp or other radiant source of light
11 – Table or desk so that, when seated, your arms can easily extend across from the relaxed position of a comfortable chair
12 – Hair dryer or similar device (not required)
13 – Cotton swabs
STEPS:
1 – Fill tray with warm water and sudsy liquid (the trick is to add water at just the right temperature so it will soften skin without being too hot to the touch)
2 – Place one hand in tray and let it soak for several minutes
3 – If you're giving someone else a manicure, you can use oil or moisturizer to massage one hand while the other one is soaking
4 – Remove soaking hand and pat dry with hand towel
5 – Place other hand in tray to soak for several minutes
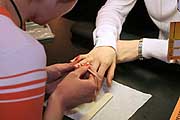
6 – While the second hand is soaking, you should carefully begin trimming cuticles that form around the edges of the nail itself (NOTE: Pay close attention to what you're doing, so you don't cut too close and end up causing skin to bleed. If you take your time and trim slowly with tiny strokes, you should be fine.)
7 – If your timing is perfect, you will be finished cutting the cuticles on that hand before the first hand gets wrinkled from being in the warm water too long. (Tip: Don't try to hurry the cuticle trimming process to make your timing work. Instead try to remember to check on the soaking hand half-way through the course of cutting cuticles. If the water is cold or the hand shows hints of wrinkling skin, that's your cue to stop the soaking operation and pat hand dry with hand towel, apply some lotion and go back to the trimming procedure.)
8 – When you have completed trimming cuticles on both hands, you should make sure all loose skin is removed from nail area. Begin to polish nails with clear base coat by applying a thin layer as smoothly and carefully as possible. Try to keep polish on nails only. If you accidentally apply too much or get extra polish on skin around nails, use a cotton swab dipped lightly in nail polish remover to correct your mistake.
9 – After applying base coat to both hands, choose polish color and repeat previous procedure beginning with the same hand you started with last time. Follow guidelines described above to produce best results.
10 – The next application will be a top coat to create a seal or protection for colored polish. Repeat previous steps to ensure success in this process. Remember less is better when it comes to nail polish. Thick layers lead to messy results.
11 – You have two choices to complete this process and make your manicure last.
(1) You can dry nails with a blow dryer or similar device set on slow speed at a moderate temperature. You should keep hands positioned under heat source for at least three minutes and then sit still, touch nothing, and wait for another minute or two to avoid smudges or smears that will ruin your efforts.
(2) You can skip the dryer process and sit still, touch nothing and wait for at least five minutes to create lasting results that will make your manicured nails look their best.
Taken From : http://health.learninginfo.org


No comments:
Post a Comment